Making Your Own Car
| Home | CO2 Racing | Cars | Physics of CO2 Racing | Making your own CO2 Car |
The first step in making your own car is to come up with an idea for
a design. Once you have a pretty clear idea of what you want your car to look like, you may begin
making sketches of it.
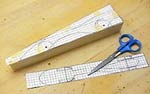
From the designs you put down on paper, you can create your actual car.
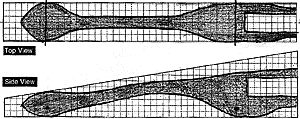
If you draw two perspectives of the car you want to build,(one side and the top) you can tape the design
to your car to make the cutting and sanding process simpler.
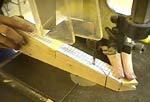
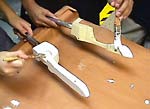
Using a bandsaw, or whatever tool works, you can cut out the general
shape of your car. It is good to be careful in this process because once you lose a part of your car,
you cannot get it back.Before you start ANY sanding, you must drill the hole in the rear of your car
for the CO2 canister matching whatever size you will use.
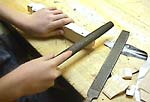
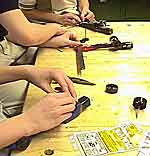
Using sandpaper, files, sanding machines, miter saws, and table saws,
you can begin the process of shaping. Take your time on this step: A lot of time invested in sanding
to make good aerodynamics will pay off when you race. Try to make it a habit of checking your work often
during the shaping process. Make sure your car's body shows symmetry. If your car's body is not sanded
symmetrically, it can reduce speed significantly.
After you are satisfied with your car's shape, you can paint it. To give
it a sleek polished look, sand it once after you apply the first layer of paint. This will grind down any
high spots or knots in the wood and make it look like a real racer. To protect it from water damage, you
can add multiple layers of paint. Most national racers add up to 9 layers.
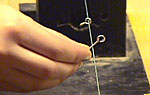
Next, you'll have to add eyelits to the bottom of your car. These
small hooks are required to keep your CO2 car on the fishline track. Make sure they are not crooked
or friction could result.
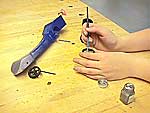
Now that your car has its basic shape, desired paint job, and
eyelits, you can begin the assembly. When you are trimming your rear axels, be sure to leave about a
quarter inch of extra room. Remember to keep the edge of the straw exactly as far out as the car's
actual body. If it extends too far, you wheel will not fit on. If it is too far in, you will not have
as good a bearing.
Moments before race time, it is important to spend time making sure
both front and rear wheels are freely turning, and that both axels are lubricated more than enough.
If you are entering a drag CO2 race, your car will be handled by others and some of the graphite may
wear off decreasing speed. Also, make sure your car rolls straight. You can test this by rolling it
down a slanted book, or just giving it a push with your own hand. If it turns right or left, you may
need to adjust the tightness of your front or real axel. If it is not possible to adjust it, you may
want to cut another axel of different length.
Now its time to race! All your hard work and patience will hopefully
pay off and you will learn either by winning or losing what you did right or wrong with your car.
If it does not do so well the first time, do not be discouraged. It is proven that 99.9% of racers
fail their first time through. Each time you race, learn from your mistakes, and improve your skills.
Keep racing! Most important of all, have fun!
| Home | CO2 Racing | Cars | Physics of CO2 Racing | Making your own CO2 Car |